6. Assembly
-
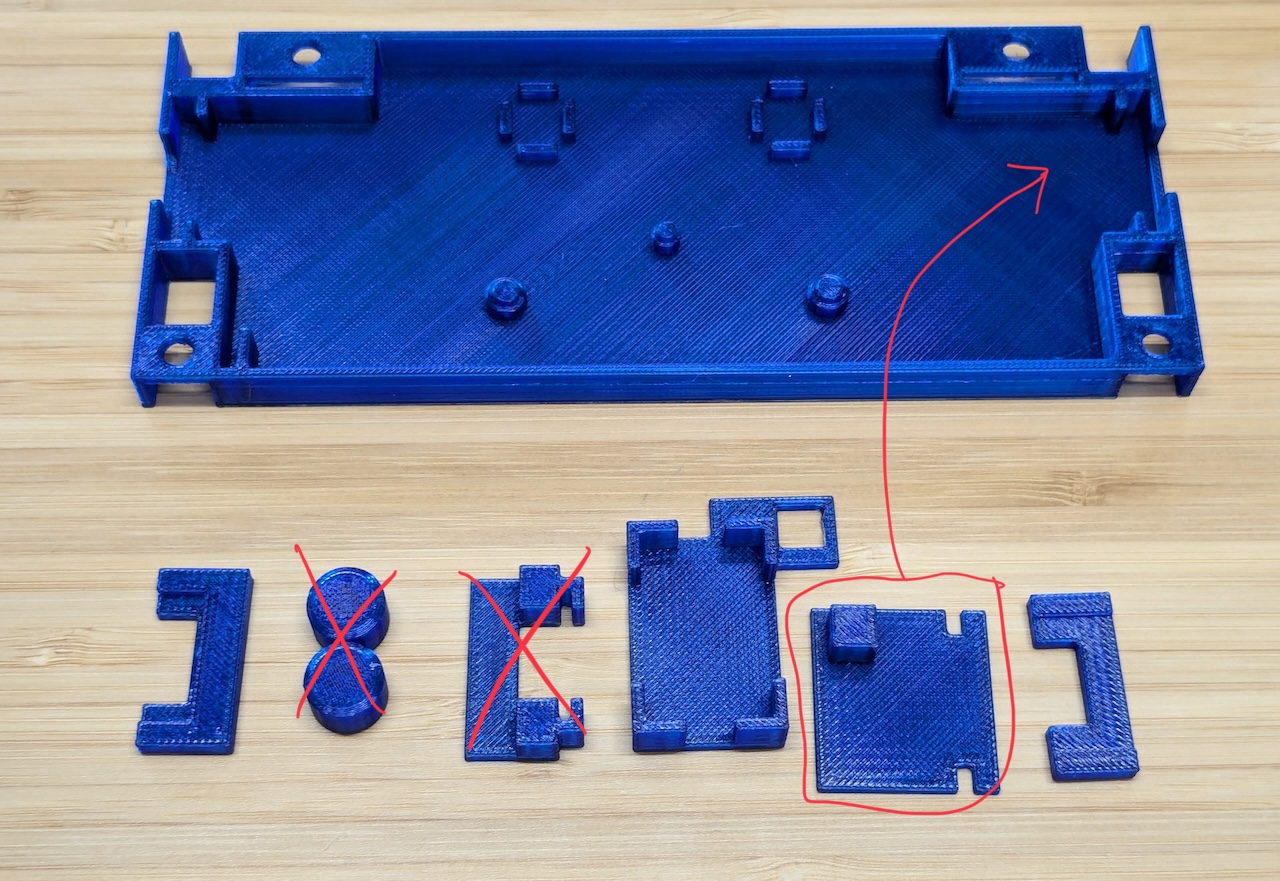
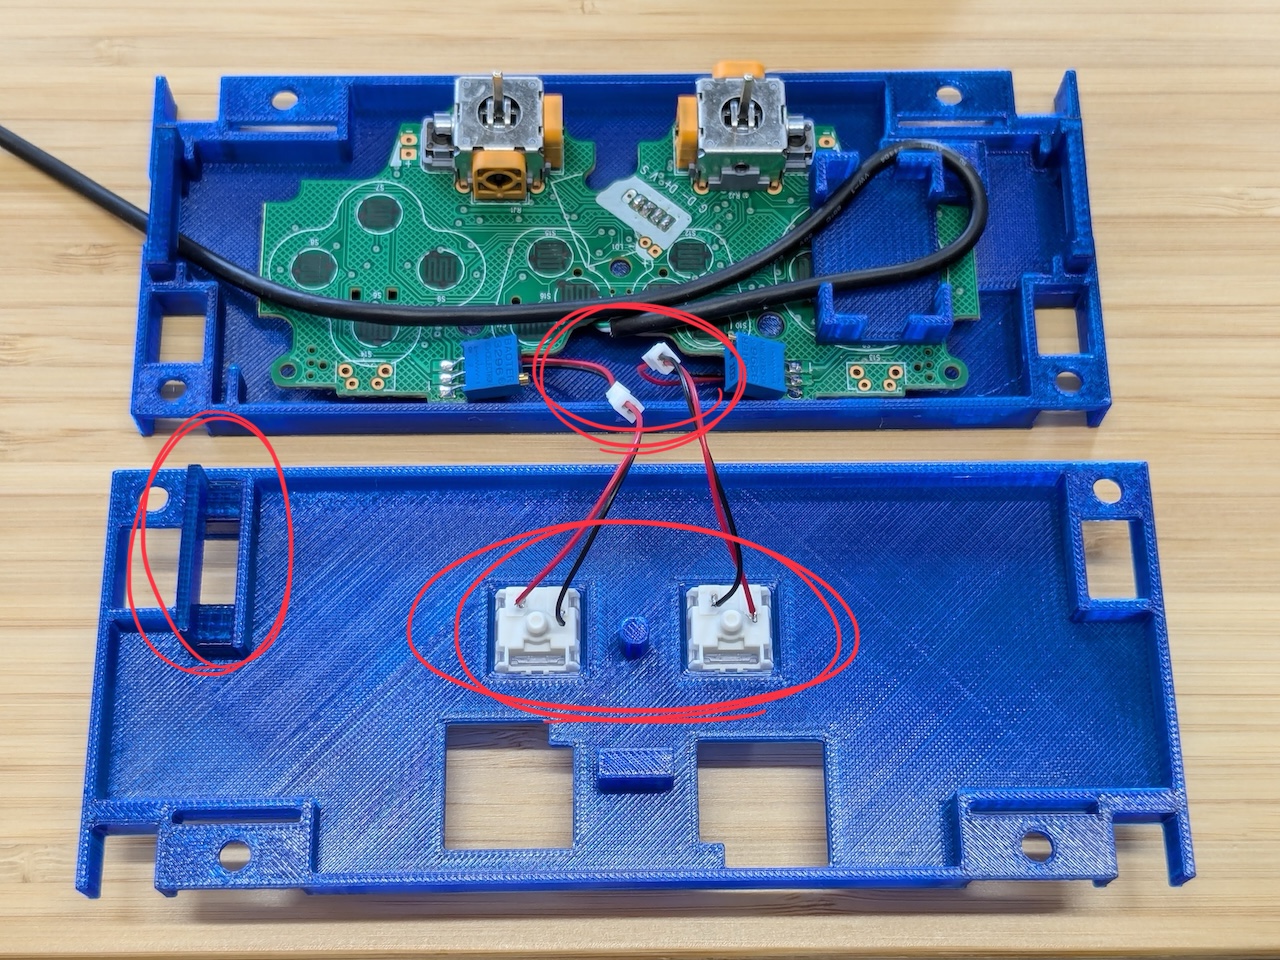
First, place the bottom part.
-
Place the circuit board and then insert the top parts.
-
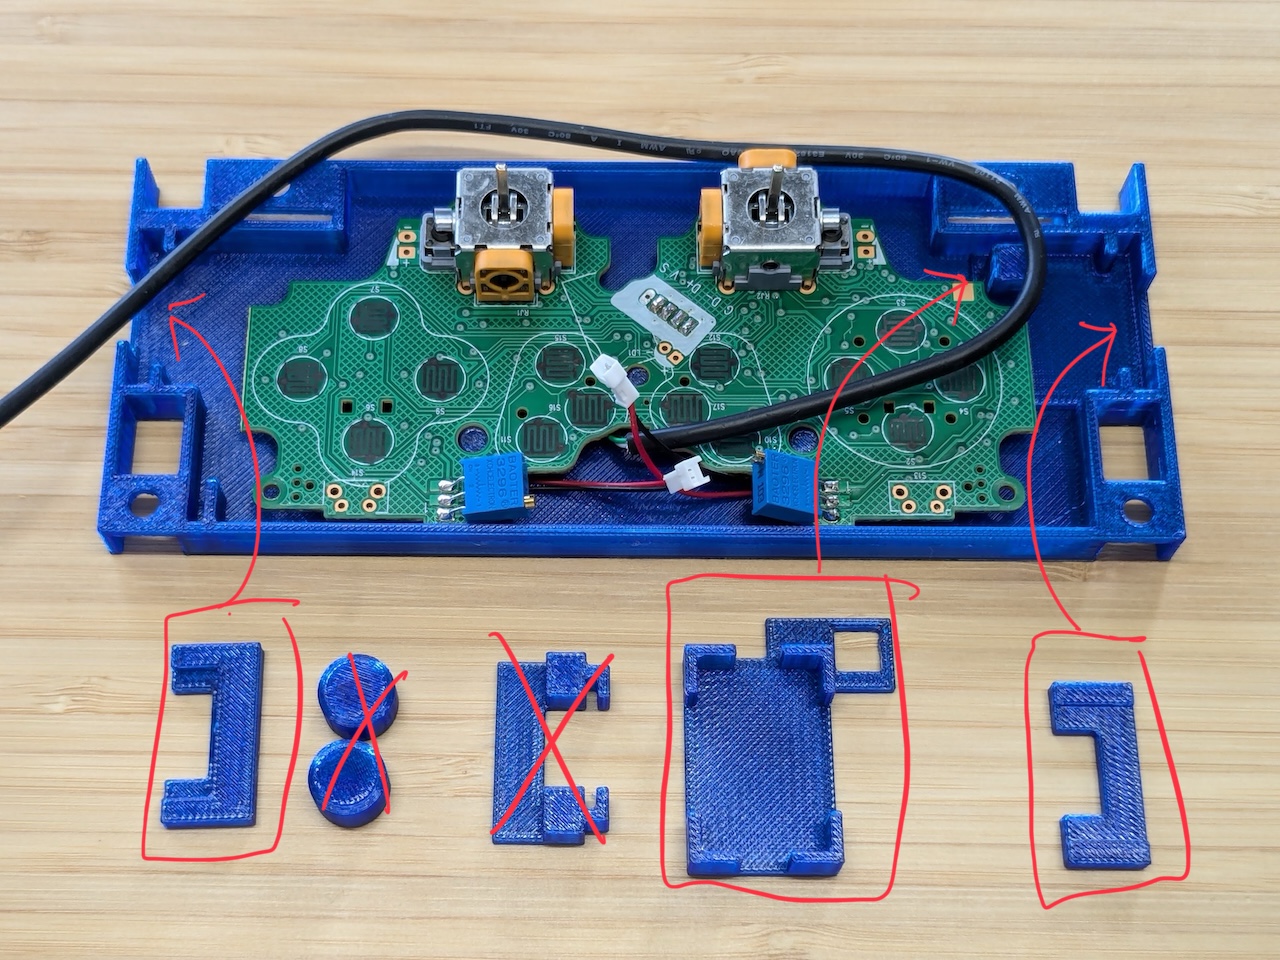
Arrange the USB cable.
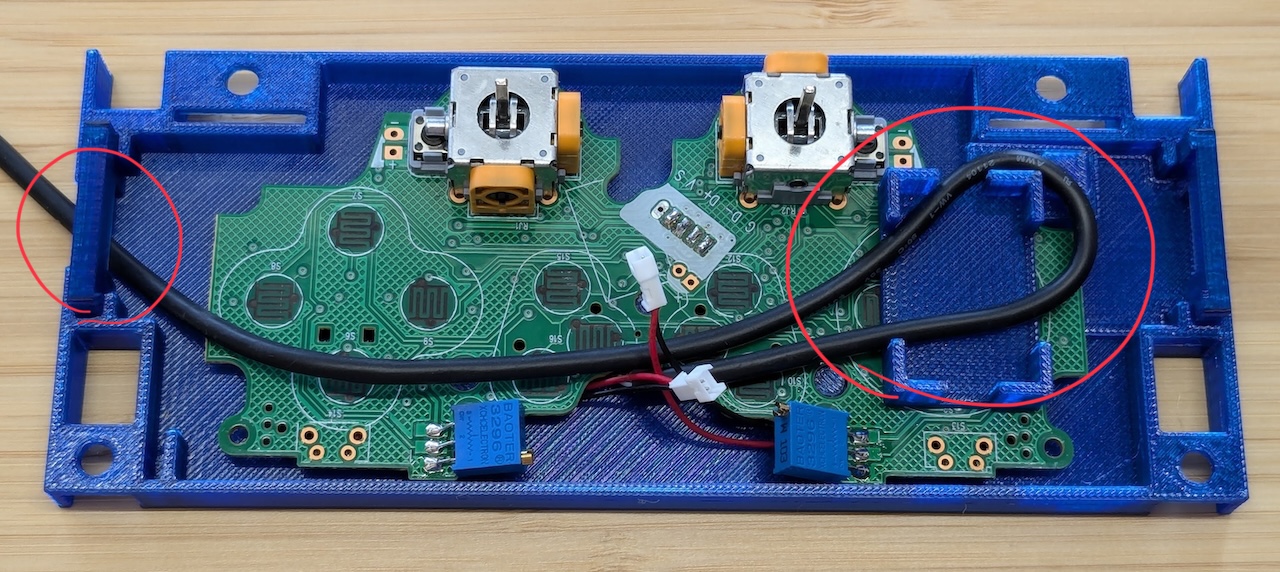
-
Attach the parts and Cherry MX switches to the top case, and connect the cables. Be sure to pay attention to the orientation when installing the parts.
-
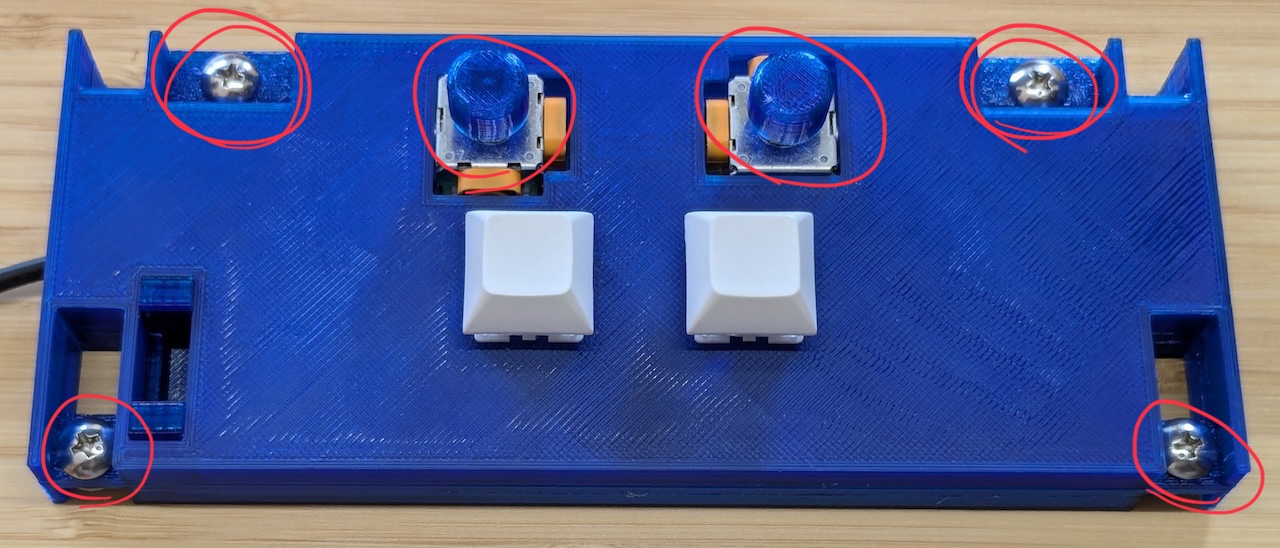
Close the case with nuts and bolts, attach the stick cover.
-
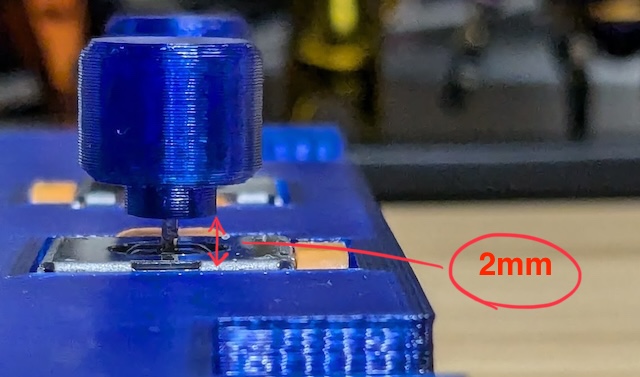
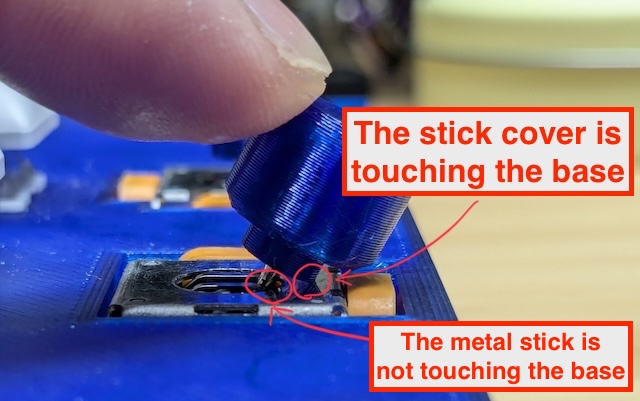
Lastly, ensure that the stick cover is fully pressed in. When fully inserted, there should be a gap of about 2mm.
Additionally, when the stick is tilted, the stick cover will contact the base, preventing the metal stick from touching the base. This gap between the metal stick and the base is crucial because if they touch, the metal stick will gradually wear down, leading to catching during operation.